Skull Granny Square: Free Pattern & Video Tutorial
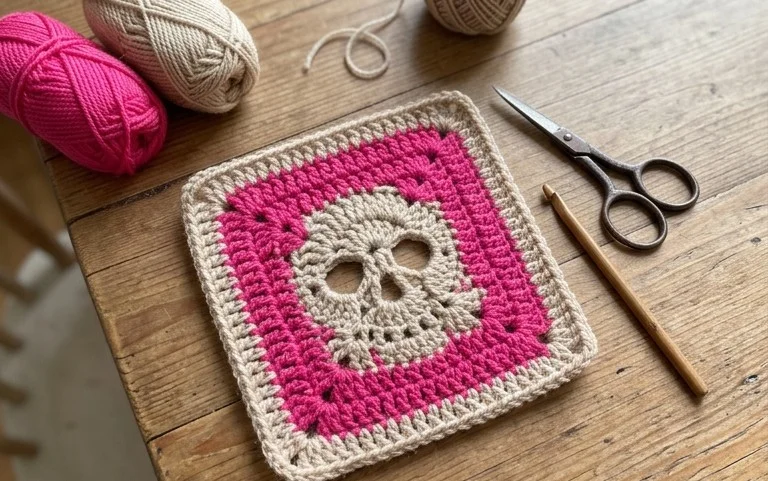
A hollow-eyed skull emerges from the center of this project, framed by the familiar, cozy geometry of a traditional square. It feels substantial in the hand, perfect for those who want a bit of spooky charm in their home decor without committing to a massive undertaking. Beginners will find the transition between the solid black center and the surrounding yarn colors remarkably forgiving, especially with the provided video guide. You gain confidence as the distinct features of the skull take shape, turning standard stitches into a conversation piece that works beautifully for blankets, throw pillows, or seasonal wall hangings.
Why You’ll Love This Pattern
The Classic Crochet Granny Square is the fundamental building block of crochet heritage, favored for its modular nature and meditative rhythm. You will appreciate how quickly each square grows, turning simple scraps of yarn into a cohesive, structured piece. It is an excellent pattern for developing consistent tension, as the repetitive clusters of double crochet stitches allow you to find a steady flow. Because you complete each round individually, it serves as a portable project that fits easily into a small project bag for stitching on the go.
I finally mastered the transition between corners and sides using this guide. It made my first blanket project feel approachable rather than overwhelming.
— Sarah, beginner crocheter
Pattern Overview & Skill Level
- Skill Level: Beginner
- Approximate Time: 30 to 45 minutes per square
- Construction: Worked in joined rounds, starting from the center and expanding outward
- Finished Dimensions: Approximately 6 inches by 6 inches using worsted weight yarn
Materials & Supplies Needed
- Yarn: Worsted weight (#4), wool or acrylic blend, approximately 20 yards per square.
- Hook Size: 5.0 mm (US H-8).
- Notions: Tapestry needle for weaving ends, sharp scissors.
- Yarn Substitutions: Cotton yarn provides a stiffer, more defined square while acrylic offers a softer drape. Using a lighter weight yarn will result in a smaller square unless you increase the number of rounds.
Stitch Guide & Abbreviations (US Terms)
- ch = chain
- st = stitch
- sl st = slip stitch
- dc = double crochet
- cluster = a group of 3 dc stitches worked into the same space
- sp = space
Step-by-Step Pattern Instructions
Granny Square Body
- Foundation: Ch 4, join with sl st to first ch to form a ring.
- Rnd 1: Ch 3 (counts as first dc), work 2 dc into ring, ch 2, *3 dc into ring, ch 2; repeat from * twice more. Join with sl st to top of beginning ch 3. (12 dc, 4 ch-2 sps).
- Rnd 2: Sl st into next 2 dc and into the first ch-2 sp. Ch 3, 2 dc in same sp, ch 2, 3 dc in same sp. *Ch 1, (3 dc, ch 2, 3 dc) in next ch-2 sp; repeat from * twice more. Ch 1, join with sl st to top of beginning ch 3. (24 dc, 4 ch-2 sps, 4 ch-1 sps).
- Rnd 3: Sl st into next 2 dc and into the first ch-2 sp. Ch 3, 2 dc in same sp, ch 2, 3 dc in same sp. *Ch 1, 3 dc in next ch-1 sp, ch 1, (3 dc, ch 2, 3 dc) in next ch-2 sp; repeat from * twice more. Ch 1, 3 dc in final ch-1 sp, ch 1, join with sl st to top of beginning ch 3. (36 dc, 4 ch-2 sps, 8 ch-1 sps).
- Rnd 4: Continue in established pattern, working (3 dc, ch 2, 3 dc) in corner ch-2 spaces and 3 dc in each side ch-1 space, separated by ch 1. (48 dc, 4 ch-2 sps, 12 ch-1 sps).
Finishing
After completing the final round, cut the yarn leaving a 6-inch tail. Pull the tail through the final loop. Use the tapestry needle to weave the end securely into the back of the double crochet stitches. Block the square by pinning it to a foam mat, misting it with water, and allowing it to air dry to ensure straight edges.
Care & Washing Instructions
- Machine wash on a gentle cycle in cold water using a mild detergent.
- Lay the item flat on a towel to air dry, reshaping it into a perfect square while damp.
- Avoid using a tumble dryer, as high heat can shrink or felt natural fibers like wool.
Pro Tips & Common Mistakes to Avoid
Maintain consistent tension by ensuring your slip stitches at the start of each round are not pulled too tight, which can cause the square to curl. Always place a stitch marker in the top of your starting chain-3 so you can easily identify the join point at the end of each round. Weave your ends in by passing the tapestry needle under the base of the stitches on the wrong side to keep the finish invisible. If you decide to add more rounds to make the square larger, keep in mind that each additional round will require significantly more yarn than the previous one.
Frequently Asked Questions
Can I use a different hook size for this pattern?
Yes, you can use a smaller hook to create a tighter, denser fabric or a larger hook for a more open, lacy effect. Note that changing the hook size will alter the finished dimensions of your square.
Is this square suitable for a beginner?
This is an ideal project for beginners because it uses basic stitches and a repeating sequence, helping you gain confidence in managing yarn tension and stitch placement.
How do I join these squares together?
You can join squares using a mattress stitch with a tapestry needle for a seamless look, or use a slip stitch join through the back loops for a decorative ridge.
Can I sell items made from this pattern?
You are welcome to sell finished products made from this pattern, provided you credit the designer and use your own photographs for your listings.
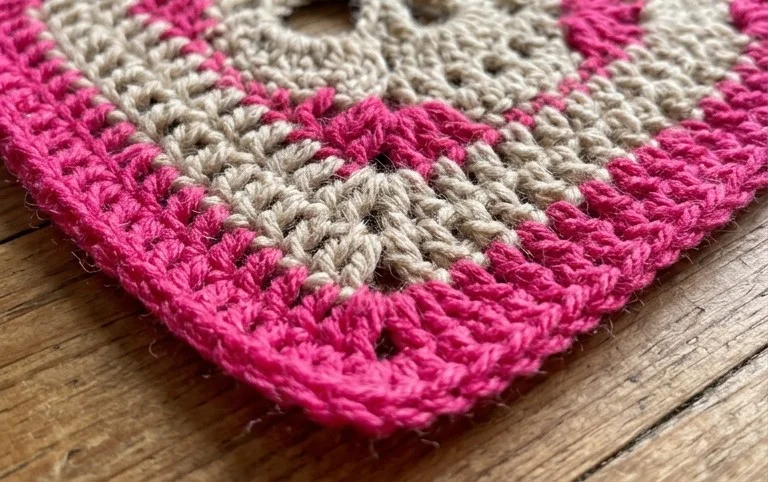
Your new piece looks striking when you experiment with high-contrast colors like deep plum or neon green against a jet black background. If you want a smaller version for a decorative bunting, simply switch to a fingering weight yarn and a smaller hook to tighten the stitches. Sharing a photo of your finished square on social media helps others find inspiration for their own yarn stash projects. Please explore the rest of my blog for more free patterns that build on your growing skills and confidence.